12.20.2010

Christmas Eating, Part 1

This year, I have been so excited for all of the food I get to make! Call me crazy, but the fact that I had to use Google Calendars to figure out what I would make and when... that just about did me in. I love it.

For round one, its been mostly sweets, much to the chagrin of Steve. But most of it has been given away (or  ever-so-selflessly taken care of by the dog) which is what I love about baking and cooking during this time of year anyway. If its all about family and friends, that's who I should be sharing with!

So for starters, a few recipes that I've made, two sweet, one savory. If there's still time (or room on your own calendar) to make one of these for Christmas or New Year's, I highly recommend it!
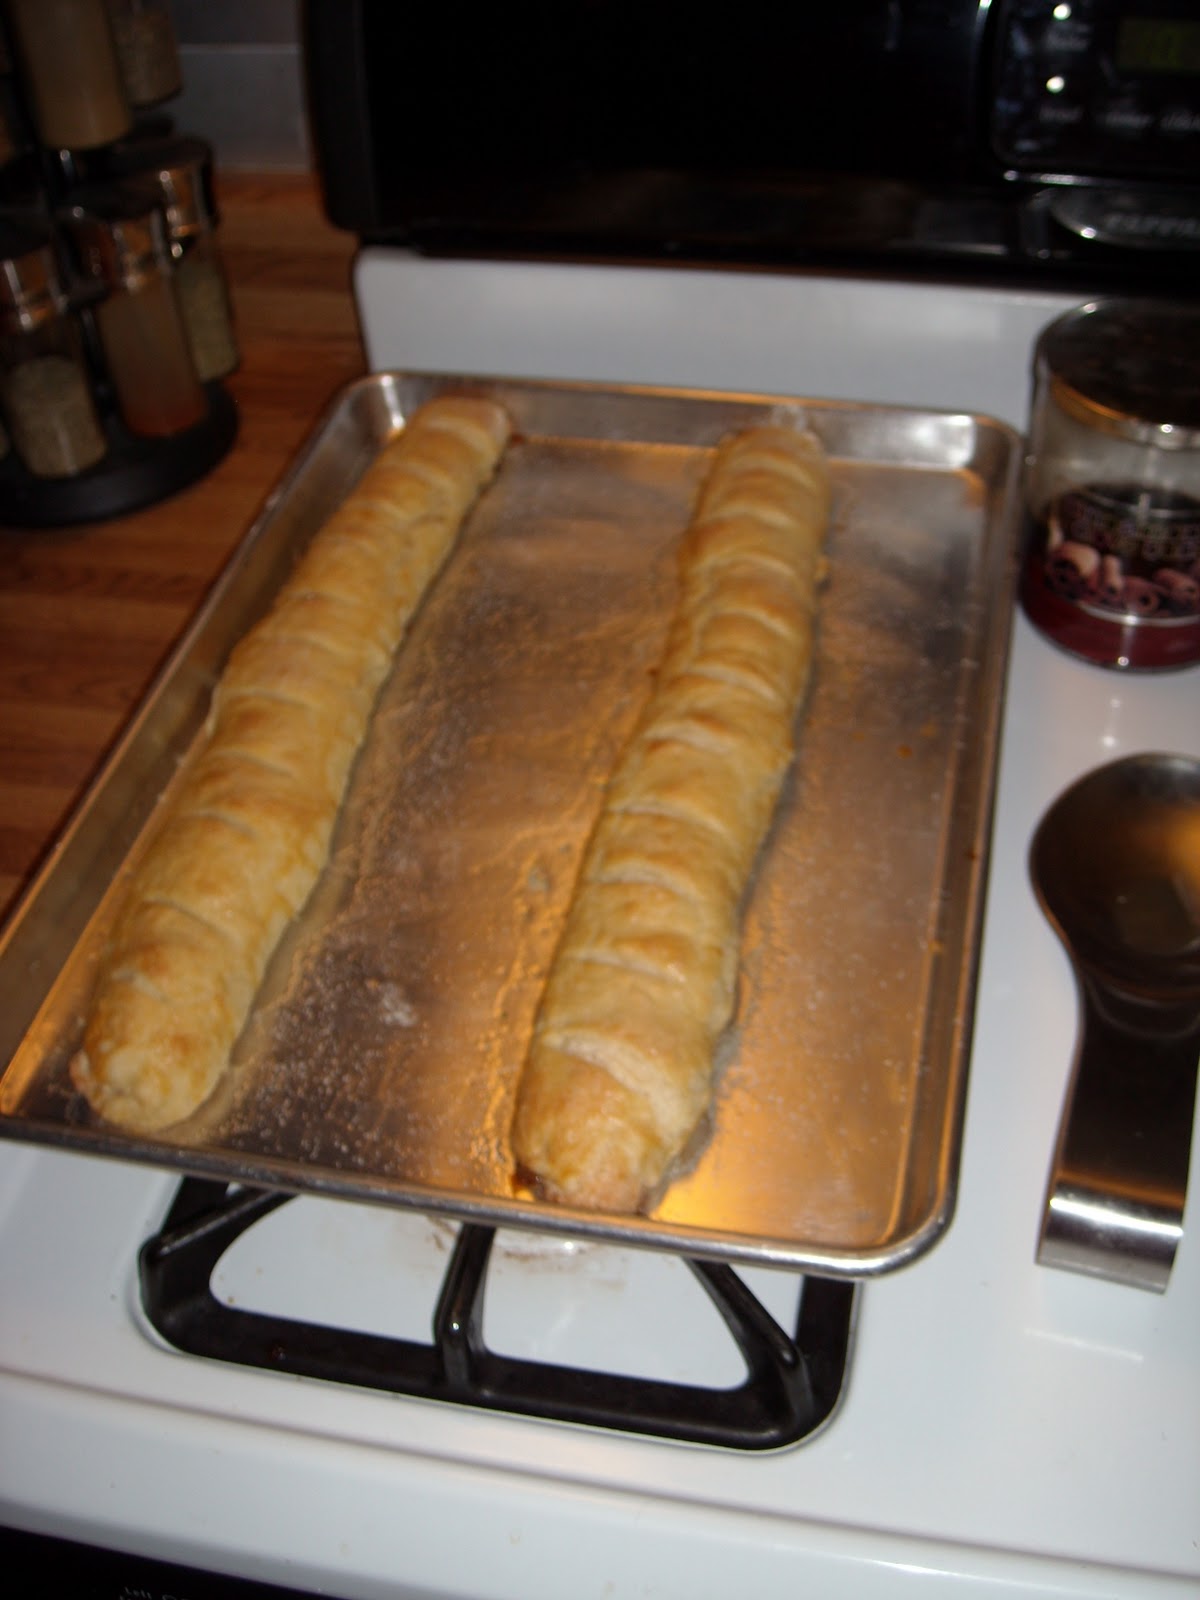
Recipe #1 - Banket

This one gets top billing because it is banket. Enough said.
I did figure out, though, that while butter makes most baked goods 10x better, it is not the case for this particular pastry. It makes the dough too delicate and it doesn't stand up well with the filling. I'm making another batch this week and will definitely use margerine. My Grandma Smits used Imperial, so that's my plan too!


No Air Banket
Recipe from Grandma Smits, Jane Adama, and Helen Koopman

Ingredients
Dough
2 cups cold margerine, cut into small pieces
3 cups flour
1/4 cup water

Filling
1 pound almond paste (please don't use the stuff in a can!)
2 cups sugar
2 egg whites (reserve the yolks for later)
Almond flavoring, optional

Directions
1. Mix dough ingredients until they just come together and margerine is completely incorporated. Form into a flat disc, wrap in plastic wrap, and refrigerate.

2. Mix filling ingredients.

3. Roll out half of the chilled dough to approximately 10 x 15 inches and cut in half (no need to seperate the two halves. Its just a dividing line).  Divide the filling into fourths. Take 1/4 of the filling, roll into long segments, and place lengthwise down one section of the dough. Roll the dough tightly around the filling, overlapping the two edges, and seal with your fingertips. Pinch together the two ends of the roll. Place seam side down on a parchment paper-lined baking sheet, and repeat with other half of the rolled out dough.

4. Repeat step three with the remaining dough and filling.

5. Lightly beat egg yolks with 1 Tablespoon of water. Brush on the top of each roll, sprinkle with sugar, and cut small, shallow slits on the top of the dough to release some of the steam (about 1"-1.5" apart).

6. Bake at 375 for about 30 minutes until golden brown on the top. Keep the banket on the pan, but set the pan on a cooling rack. Once cool, wrap in plastic wrap - they will keep well for about a week (if it lasts that long) or wrap in a layer of tin foil as well and freeze.

Makes 4 - 15" sticks


Recipe #2 - Almond Roca
This might be the easiest candy to make. If you have a good candy thermometer, there's nothing to fear! I've made 4 batches, one more than necessary, because I was sure one of them wouldn't turn out. Right now, we still have about half of a batch sitting on our counter, calling my name, if that tells you anything about my success with the recipe. It works, trust me! No adjustments needed.

Almond Roca
Only slightly changed from the recipe at Taste of Home

Ingredients
1/2 cup slivered almonds
1 cup butter, cubed
1 cup sugar
3 Tablespoons boiling water
2 Tablespoons light corn syrup
1 cup semi-sweet chocolate chips

Directions
1. Sprinkle almonds on a 10 x 15 baking sheet. Bake at 300 for about 15 minutes until toasted (you'll know when they're done - as soon as you can smell the almonds, take them out).  Remove the pan from the oven (don't remove the almonds from the pan) and set aside. Turn off the oven.

2. In a large saucepan over low heat, cook butter and sugar for 5 minutes. Add water and corn syrup. Bring to a boil over medium heat; cook, stirring occasionally, until a candy thermometer reads 290° (hard-crack stage). Quickly pour over almonds. Sprinkle chips on top and put in the cooling oven for 1-2 minutes or until melted. Spread chocolate over candy.

3. After chocolate is spread, use a pizza cutter to cut the candy into the size pieces you'd like to have when you break it later on. They won't always come out perfectly, but it  creates a slightly more uniform candy. Cool completely; break into pieces. If you want a more "rustic" looking candy, skip the cutting earlier on and just break it up how it wants to be broken.

Makes about 1 1/2 pounds of candy


Recipe #3 - Ham & Cheese in Puff Pastry
Are you going to a Christmas party where there will be kids? Want to take something good to eat that's not too far outside of a kid's preferances? This is the thing. The title pretty much explains it all. My mom's made it before and eaten it as a main course, and why not? Its pretty much a fancy ham and cheese sandwich, but you can totally get away with making it an appetizer or finger food at a festive party.

Ham & Cheese in Puff Pastry
Adapted from The Barefoot Contessa

Ingredients
1 package frozen puff pastry, defrosted
1 Tablespoon whole grain mustard
1 Tablespoon dijon mustard
1/4 pound black forest ham
1/2 pound swiss or gruyere cheese
1 egg beaten with 1 Tablespoon water (for egg wash)

Directions
1. Preheat the oven to 450 degrees F. Line a 10 x 15 baking sheet with parchment paper.

2. Lay 1 sheet of puff pastry on a floured board and carefully roll it out to 10 by 12 inches. Place it on a sheet pan and brush the center with the mustard, leaving a 1-inch border around the edge. Place a layer first of ham and then cheese, also leaving a 1-inch border. Brush the border with the egg wash.

3. Place the second sheet of puff pastry on the floured board and roll it out to 10 by 12 inches. Place the second sheet on top of the filled pastry, lining up the edges. Cut the edges straight with a small, sharp knife and press together lightly. Brush the top with egg wash and cut a few slits in the top to allow steam to escape.

4. Bake for 20 to 25 minutes, until puffed and golden brown. Cut into desired size pieces, whether for a main dish or for an appetizer/finger food. Allow to cool for a few minutes and serve hot or warm.

11.22.2010

Somethin' Special

Cinnamon rolls have always been something special in our family. My mom made them for special occasions (Christmas, special Sundays, coming home from college), and even if it wasn't a special occasion, the cinnamon rolls made that morning special.  When they were made from scratch, it was quite the process involving lots of time and a large Tupperware bowl. Later on, the introductions of the breadmaker and Pillsbury Hot Roll mix made the process much easier and less time comsuming.  Every time I have them, I'm taken back to growing up and special occasions. Other cinnamon rolls from a restaurant, from other kitchens, or from a tube just don't measure up.

I saw this recipe a few months ago and was hesitant (see above). But last weekend, Steve, sister-in-law Asheley, and brother-in-law Tom ran a 5K. I thought "What better time to make calorie-laden cinnamon rolls than to celebrate after a race?!" I started the night before since I decided to try a recipe from scratch, popped the dough in the fridge overnight, and then rolled them, raised them, and baked them off the next morning. Yes, it was a lot of work, but I'd do it all over again! Or at least take the ones out of the freezer and re-heat those.

A few things I would do differently...
~ After I let the dough rise the evening before, I forgot to mix in the additional flour and leavening. I tried doing it the next morning, but it got too punched down and the first batch I did the next day didn't rise well. Next time I'll try harder to remember to mix it the evening before.
~ I used 9x13 foil pans since I knew I'd be freezing most of them and I squeezed 15 into each pan. While they are nice and gooey, they're also pretty dense. I'd limit it to 12 in a pan next time.
~ Scald the milk in a large soup pot/stock pot. I did it in a sauce pan, but ended up getting a second pan dirty when I had to transfer it anyway. I don't like having to do more dishes than necessary.

Cinnamon Rolls
Adapted a very little bit from The Pioneer Woman

Ingredients
Cinnamon Rolls
1 quart (4 cups) Whole Milk
1 cup Vegetable Oil
1 cup Sugar
2 packages Active Dry Yeast (not Rapid or Fast-Acting)
8 cups + 1 Cup All-purpose Flour, divided
1 teaspoon (heaping) Baking Powder
1 teaspoon (scant) Baking Soda
1 Tablespoon (heaping) Salt
Plenty Of Melted Butter
2 cups Sugar
Generous Sprinkling Of Cinnamon

Frosting
1 bag Powdered Sugar
1 teaspoon vanilla extract
3/4 cups Milk
1/4 cups Melted Butter
1/8 teaspoons Salt

Directions
Mix the milk, vegetable oil and sugar in a pan. Scald the mixture (heat until just before the boiling point). Turn off heat and leave to cool 45 minutes to 1 hour. When the mixture is lukewarm to warm, but NOT hot, sprinkle in both packages of Active Dry Yeast. Let this sit for a minute. Then add 8 cups of all-purpose flour. Stir mixture together. Cover and let rise for at least an hour.

After rising for at least an hour, add 1 more cup of flour, the baking powder, baking soda and salt. Stir mixture together. (At this point, you could cover the dough and put it in the fridge until you need it – overnight or even a day or two, if necessary. Just keep your eye on it and if it starts to overflow out of the pan, just punch it down).

When ready to prepare rolls: Sprinkle rolling surface generously with flour. Take half the dough and form a rough rectangle. Then roll the dough thin, maintaining a general rectangular shape - should be 12-18 inches x 24-30 inches. Drizzle 1/2 to 1 cup melted butter over the dough. Now sprinkle 1 cup of sugar over the butter followed by a generous sprinkling of cinnamon.

Now, starting at the opposite end, begin rolling the dough in a neat line toward you. Keep the roll relatively tight as you go. Next, pinch the seam of the roll to seal it.

Spread 1 tablespoon of melted butter in a 9x13 pan (you can also use round cake pans for smaller batches). Then begin cutting the rolls approximately ¾ to 1 inch thick and laying them in the buttered pans.

Repeat this process with the other half of the dough. Let the rolls rise for 20 to 30 minutes, then bake at 400 degrees until light golden brown, about 15 to 18 minutes.

For the frosting, mix together all ingredients listed and stir well until smooth. It should be thick but pourable. Taste and adjust as needed. Generously drizzle over the warm rolls.

Makes ~3 dozen cinnamon rolls

9.28.2010

Mid-East Feast

I honestly can't remember when I started falling for mid-east cuisine, but I've fallen hard. Its still a treat for me too, since Steve isn't a huge fan of Middle Eastern and Greek foods. Is this a guy thing? I've heard of many other guys who, as one put it, "have never found (him)self craving something with chickpeas." But hummus, tahini, falafel, dolmades, spanikopita, I'll take it all.

This is a pretty good introduction to this part of the world's food - nothing too drastic but still a few new flavor combos (Apricots in a meatball? Say what?!?) None of these ingredients are too difficult to find either - the ground coriander could be tough, but you can always take coriander seeds and grind them in a peppermill if you like. 

One thing I would change is to use my handy-dandy food chopper to chop the red onion - they didn't hold together very well with all the chunks of onion and apricot floating around in there. Smaller pieces would fix that, I believe.

And don't miss out on the dressing - its a refreshing bit that will totally transform the meal!


Meatballs with Couscous and Feta
Adapted from Real Simple, October 2010

Ingredients
Salad
1/2 English cucumber, halved and thinly sliced
1/2 red onion, thinly sliced
1/4 cup vinegar (white is just fine, but rice vinegar is pretty tasty)

Meatballs
1 pound ground lamb, beef, or a mixture of the two
1/4 cup dried apricots, finely chopped
1/2 teaspoon ground coriander
1 small red onion, finely chopped
salt and pepper
1/3 cup breadcrumbs

1 box couscous such as this
4 ounces Feta, crumbled

Dressing
3 tablespoons olive oil
3 tablespoons fresh lemon juice


Directions
1. (Can be done ahead of time) Combine the cucumbers, sliced onion, and vinegar in a medium bowl. Toss well, season with salt and pepper, and set aside (refrigerate if making this ahead of time).

2. Heat oven to 350. In a medium bowl, combine the lamb, apricots, coriander, chopped onion, ½ teaspoon salt, and ¼ teaspoon pepper. Form into 1 ½-inch balls (about 20) and place on a baking sheet lined with foil. Bake until cooked through, 18-22 minutes.

3. Meanwhile, prepare the couscous according to the box's directions.

4. In a small bowl, mix together the oil, lemon juice, and ¼ teaspoon each salt and pepper. Set aside.

5. Serve the couscous with the meatballs and cucumber salad - sprinkle feta over the top. Drizzle with the dressing.
 
Serves 4

9.27.2010

Kitchen Lessons, Part I

No recipe this time - just a few tips, tricks, observations, and lessons from along the way. These are all directly related to something I have recently made or something that will be popping up later this week. That'll keep you guessing, eh?

Observations
  1. Fresh garlic is super cheap and it keeps for a loooooong time.
  2. Fresh garlic can be a pain to peel and chop.
Tips & Tricks
  1. To peel fresh garlic, you have two options:
    • Leave a bit of the bottom part on the garlic clove (don't know the real term for it). Cut into that until you're almost through, then use that to help start the peel for the rest of the clove.
    • If you have a pot of hot or boiling water already, dunk the cloves into the water for about 10 seconds and the peel will slide right off. Genius. (And I can say that because it wasn't my idea.)
  2. To avoid chopping garlic with an actual knife, use a food chopper. I have one right now that I use for both garlic and nuts. I plan to buy a second one just for garlic as soon as I get another 20% off BB&B coupon. Although the garlicy nuts aren't too bad, unless they're in cookies.
Lessons
  1. If the recipe doesn't look appetizing when you read it, it probably won't be appetizing once you've put in the time and effort to cook it.
  2. If a recipe looks like goulash, smells like goulash, and quacks like goulash, its probably goulash. Even if its called "stroganoff." We wouldn't have eaten it twice this week if I had paid attention.
  3. When you're making a recipe by The BC, heed her directions. They will not fail.

9.22.2010

Its Just Plain Tasty

Tomorrow begins my favorite season, hands-down - Fall. Fall and I get along famously. Apples, cider, pumpkin bread, stew, squash, leaves, and weather that's still warm enough to grill, but its okay if you're drinking hot chocolate at the same time that you're flipping burgers. But if you are in the mood for something a little more "stick-to-your-ribs" this is a good one. We got a wok for a wedding present and while the wok is great, another fantastic part of present for me was a batch of new recipes to go with it.

And I'll just say that there isn't a lot I would change about it! You can play with it a little bit to fit whatever you have in the house (green bell pepper, chicken stock, pasta, you get the idea). This is exactly how I made it with the exception of partially freezin the beef. I was so proud of myself for remembering to take the meat out of the freezer to thaw that I didn't have the heart to break it to myself that I hadn't followed the recipe correctly. So I just cut it raw and everyone lived happily ever after!

If you want a little more heat, or if your paprika is a little old and lacking in zip, a few drops of hot sauce are a welcome addition. (But still put the paprika in because it makes the sauce pretty.)


Hungarian Goulash
From Aunt Arlene Dyk

Ingredients
1 1/4 pound round steak
1/4 cup margarine
2 large onions, chopped
1 red bell pepper,chopped
1-7oz can diced tomatoes, undrained
3/4 cup beef broth
3 Tbsp. paprika
1 tsp. salt
3/4 cup sour cream
3 Tbsp. flour
Cooked egg noodles

Directions
Partially freeze beef, then slice across the grain into bite-sized strips. In a wok or large sauté pan, melt butter, and half of the beef, and cook until brown. Remove and repeat with the other half of the beef.

Sauté onions and peppers until tender; return beef back into pan. Stir in tomatoes, broth, paprika, and salt.

Cover and simmer 15 minutes until beef is tender.

In a bowl, blend together sour cream and flour. Add 1 cup of sauce from the pan to sour cream mixture. Blend sour cream mixture to the pan; cook and stir until thick and bubbly. Serve over noodles.

Serves 4

8.17.2010

Vegging Out

This week, Steve and I are vegetarians!  While we have a stash of good ol' beef dogs and turkey burgers for Henry, the two of us are trying out going meatless to see if we eat better, feel healthier, etc... Its not going to be a complete lifestyle change or anything like that, but if nothing else it's a fun challenge for meal planning! (Yes, I think meal planning is fun...)

Monday kicked things off well with a Caprese sandwich, or at least what was supposed to be. I toasted the sourdough and roasted the tomato slices which made them really sweet and concentrated, but because we didn't have mozzarella, I used goat cheese instead, and then topped it off with basil. So good...

We didn't actually get to eat together tonight, but I spent part of the afternoon making a pretty healthy risotto with the thought that we could re-heat the leftovers as needed to keep up with the vegetarian theme of the week. Yes, I realize that this recipe does use chicken stock so its not truly vegetarian, but its the thought that counts, right?!

I find I always let my risotto go a little bit to long. I used 5 cups of chicken stock when I should have stopped myself at 4.  Test your rice as you cook - it should be cooked through but still have a little bite to it. It will keep cooking as you add the rest of the ingredients, and if you cook it to perfection before that point, it will end up a bit mushy. The flavor will still be great, but it won't be creamy and luscious like it should be.

Summertime Risotto
Adapted from Self.com

Ingredients
1 pint cherry tomatoes
1/4 cup olive oil
1 clove garlic, minced
1 small onion, diced
2 cups diced zucchini
1/4 cup fresh lemon juice
1 pound (about 2 1/2 cups) arborio rice
1 cup dry white wine
4 cups nonfat chicken broth
2 tablespoons unsalted butter butter
6 tablespoons grated Parmesan
Salt & Pepper

Directions
Heat oven to 250°. Gently toss tomatoes in 2 tsp oil with a pinch of salt and pepper. Spread tomatoes in a single layer on a baking sheet lined with tin foil. Bake for 1 hour.

Heat 1 tsp oil on medium heat in a medium pan. Cook garlic and half the onion until translucent; add zucchini and cook 5 minutes. Puree zucchini mixture in a blender with lemon juice and 1 tbsp oil. Add 2/3-3/4 cup of the roasted tomatoes and puree until completely incorporated.  Season with salt and pepper. Set aside.

Heat 1 tbsp oil in a medium pot on medium heat and sauté remaining onion until translucent. Add rice and cook 2 minutes. Gradually pour in wine, stirring until rice absorbs wine. Add broth 1 cup at a time until absorbed, stirring continually for 20 minutes or until rice is tender (add more broth if necessary). Once rice is cooked, stir in zucchini puree, butter and cheese.

Top risotto with remaining roasted tomatoes and enjoy!

Serves 6

8.12.2010

Fancy & Simple

Because we have a few herb plants on our deck this summer, I've been looking for ways to use them (for more than just decoration anyway). This is a super-simple way to make your bread a bit more "fancy." Its so good that I may or may not have had a cold piece of this bread for lunch the next day. If you really want to be really fancy, you can call it "French Bread with Chive Garlic Compound Butter." Or to be really really fancy you can call it "Pain français avec du beurre de composé d'ail et ciboulette." But I'll just call it...

Chive Garlic Bread
From "Taste of Home"

Ingredients
1 loaf french bread
6 Tbsp. butter, softened
1/4 cup grated parmesan cheese
2 Tbsp. chives, finely chopped/snipped
1 garlic clove, minced

Directions
Preheat oven to 350.

Cut the loaf of bread into 1 1/2 inch slices, not cutting all the way through the bottom of the loaf. Place on a sheet of tin foil long and wide enough to wrap around the bread.

In a bowl, combine butter, cheese, chives, and garlic. Spread on each side of each slice of bread. Wrap in the tin foil and tightly seal the edges.

Place on a baking sheet and bake for 25-30 minutes or until heated through.

Serves 6-8


Image from http://www.cookinglight.com/

8.09.2010

What We (Will Be) Eating

It all started about 2 years ago. I was wandering through Cost Plus World Market on a Friday evening when I came across the clearance food rack. This was a favorite in the store because it was a nice way to try food I wouldn't otherwise have given a second glance. And on that clearance food rack was a packet of dill pickle mix for canning. Now, I've never canned before, but I remember having lots of mason jars of pickles, tomatoes, and peaches in our basement growing up. So I decide to give it a try myself!

It took about a week to get all of the supplies together (jar lifter, jars, lids, bands, cucumbers, etc...) but the next Friday night I gave it a shot. To be honest, they weren't my favorite; they were a little on the sweet side.  But that got me to try freezer jam, canning cranberry sauce, strawberry rhubarb jelly, and a few others, mostly in the freezer-preserving category.

I found myself running out of freezer space and also in posession of a Barnes & Noble gift card. I was wandering around trying to think about what I could buy, when I saw this:


I have about 20 "to try" recipes dog-eared right now, but I started simple with the basic pickled vegetable recipe. Its about two pages long and really detailed, which makes it perfect for a beginner like me. If you find yourself in a bookstore, check it out. Its pretty fun. And in about 5 weeks, I'll let you know how the pickled cucumbers and carrots taste!

8.06.2010

Good & Simple

It used to be that whenever I bought bananas, at least one, usually more, would go brown on our counter. Then into the freezer they'd go until I had enough to make a batch of banana bread. These days, we're going through literally three bunches of bananas a week since they're Henry's favorite food, so we don't get to have brown bananas anymore. So Wednesday, I took matters into my own hands - I put three perfectly yellow bananas into the freezer because I wanted banana bread.

I've tried lots of recipes for banana bread. Some are sweet or exotic (and these were both tasty), but this one is just banana bread - plain and simple. Or good and simple. Or delicious and simple. Because you don't need to mess with the flavor to make it delicious. If you have a good texture and good bananas, that's really all you need.


I'm going to share with you the key to making banana bread, and its something I stumbled upon by necessity. Storing bananas in the freezer (see above) makes them very mushy inside. All you have to do is let them thaw at room temp for about 30 minutes (or if you're like me and don't have the patience, thaw them in the microwave), cut off one end of the banana in its peel, and squeeze the banana into the bowl like you'd squeeze frosting out of a bag.  This isn't a pretty sight - Steve was at first grossed out and then fascinated by this. But you hardly have to mash the banana after that, and I like the texture it gives the bread. So there you have it. Freezer bananas are the way to go.

Note: In order to make sure I was spelling "bananas" correctly, I sang the one line from "Hollaback Girl" in my head a number of times while writing this post (B-A-N-A-N-A-S!) But it was the one from "The Office" when Kelly sang it. Not the Gwen Stefani one. Too much language. :)

Banana Bread
From Lois Smits

Ingredients
2 cups sifted flour
1 tsp. baking soda
1 tsp. baking powder
1/2 tsp. salt
1/2 cup butter
1 cup sugar
2 eggs
1 1/4 cup mashed banana (about 3)
1/2 cup chopped nuts (optional)

Directions
Preheat oven to 350. Grease and flour a 9x5x3 inch bread pan.

Sift flour, soda, powder, and salt together and set aside.

Cream together butter and sugar, then add eggs until well-combined. Add flour mixture and bananas alternating between the two. Beat well after each addition. Fold in nuts if using. Pour into the prepared pan and let sit for 15 minutes.

Bake 45-60 minutes or until toothpick comes out clean (it will look golden brown before it is actually done - test it to be sure).

Makes 1 loaf. Will last maybe 2 days, not because it goes bad, it just won't last.

8.03.2010

Home-Grown

This summer, I'm trying something new - a garden! More specifically, our garden is a container garden on our deck. I'd love to have a big garden in our backyard, but I don't always know what the neighbors put on their lawn, and I don't know if I want to eat whatever it is! So Roma Tomatoes, Sweet 100 Cherry Tomatoes, chives, basil, and cilantro are all growing splendidly on our deck. The best crop so far has been the basil - throw it in bruschetta, pasta, eat it plain... But the chives and cilantro have made brief appearances as garnishes as well.

The real up-and-coming stars, though, are going to be the tomatoes.


We at our first cherry tomato today, and can I tell you how sweet it was? It tasted so tomato-y. We've had green tomatoes on the vine for about 5 weeks now, and I'm getting a little antsy, although I suspect that they'll all turn red at once and we'll have tomatoes coming out of our ears. But we'll share! What could be better than bruschetta or salsa made with tomatoes and herbs from three steps away? It doesn't get much fresher than that.

8.02.2010

Deep Breath...

Today, I cooked salmon for the first time. Ever!

I really love cooking and trying out new recipes, and I think I'm pretty good at it too (patting self on back:). However, seafood has always stumped me. Frightened me. Unnerved me. But today, I was at Meijer and they had salmon, you guessed it, on sale, and it looked so nice. So I decided, "Its now or never."

I get home, and hop online to my favorite recipe sites - epicurious, Smitten Kitchen, Orangette, Food Network, and Pioneer Woman. Didn't see much that looked good until I went to the Tasty Kitchen section of PW, and (angels singing) there it was. Salmon in a Foil Packet. Its easy, there's little to no clean-up, and I like everything that goes in it! To paraphrase Joey from Friends, "Garlic, good! Wine, good! Lemon, good! Butter, gooooooooood!"

A few notes as I was making it...
~ Our salmon filets came with lots and lots of bones in them. Fortunately, they were big enough that they were easy to find. (Although I found myself wishing for one of those really fine needle nose pliers like they use on Top Chef. But I just wanted them to look cool.) Steve and I both noted that it did make us slow down and concentrate more on chewing our food which sounds strange, but is really interesting when you think about it. You taste more flavor and are more aware of texture. Plus, its good to slow down and unwind at the end of a busy day.
~ I would use more lemon. The garlic was pretty powerful, and I like garlic so it wasn't all bad. But the wine got lost in the shuffle. So next time: same garlic, less wine, more lemon juice.
~ Use good dill!  Whether its a newly purchased dried dill or a bit of fresh dill, use good dill! We just got the faintest taste of it and it was quite nice, though we would have liked more. Our dill was over 1 year old... too long.
~ And don't forget Ina's rule, "If you're cooking with wine, make sure its wine that you would drink."

And the salmon was delicious!

Salmon in a Foil Packet
Adapted from carmelasmythe on Tasty Kitchen

Ingredients
Olive oil
1 pound salmon filet(s)
1/3 cup white wine
Juice from 1/2 medium-small lemon
2 medium cloves garlic, minced
1 teaspoon dill
salt and pepper to taste
2 Tbsp. butter, cut into small cubes

Directions
Preheat oven to 375 degrees. Place a large square of foil on a sheet pan and sprinkle lightly with olive oil. Place salmon filet(s) on top.

Drizzle white wine and lemon juice over salmon, and sprinkle on garlic, dill, salt and pepper. Dot the cubes of butter evenly on top of the salmon.

Bring up sides of the foil to fold/roll together and create a nicely sealed packet. Leaving packet on the sheet pan (to save a crazy mess in the stove, you know), bake for 20 minutes.  Remove from the oven, but don't open the packet, and let it sit for an additional 5-10 minutes. Fish is ready when it is opaque and flakes with the touch of a fork (don't look for it to be that whitish-pink all the way through - it'll be overcooked).

7.19.2010

Welcome, Summer!

Summer is completely here - bugs, humidity, and fireworks. And GRILLING!

Steve and I decided that July would be a good month to concentrate on eating food that's better for us. (This decision following our fantastic trip to St. Louis in which we each ate something called a Concrete. Its not called a Concrete for nothin'...) The last day of our trip was July 1. Do you know how hard it is to eat healthily in a roadside diner?!?

Sometimes this "eating healthy" thing means avoiding sweets, pop, fried foods, and junk food, but I still will use butter, oil, and other "whole ingredients." Personally, I'd rather eat food that is as natural as possible, rather than something that has a few less calories but a whole lot of fake ingredients. Personal choice, yours may be different!

So back home, we kicked it into full gear. Fresh fruits and veggies are overflowing on our countertop. The best part about having so many of these on hand is that you never have to think about what to have with supper. Corn, asparagus, green beans, watermelon, tangerines, blueberries, tomatoes, potatoes... they all work. These are short recipes, but really, during the summertime, isn't that what we're looking for anyway?

Note: Whenever you're marinating meat, it works so well to do so in a Ziploc bag and put that bag in a bowl, giving it a squeeze now and then. It keeps the marinade all over the meat, rather than the meat just sitting in the marinade in a dish.

Note II: We didn't serve the bruschetta on toast... we had it on grilled portobello mushrooms. Wow, that was good!


Roasted Country Ribs
Adapted from Epicurious.com
Ingredients
1.5-2 pounds country pork ribs (4-6, figure about 2 or 3 ribs per person)
2 Tablespoons coarse grain mustard (you can use dijon, but I like the tang of coarse grain)
1 Tablespoon red wine vinegar
1/4 cup olive oil
1 Tablespoon Montreal steak seasoning (substitute your favorite seasoning mix here. Jane's Crazy Mixed-Up Salt would work too)
1 Tablespoon water

Directions
Preheat oven to 350.

In a bowl, whisk together mustard, vinegar, oil, seasoning, and water.  Put ribs into a large Ziploc bag and pour the dressing on top and seal. Squeeze to cover ribs, and let sit for at least 15 minutes, but not more than 1 hour.

Put the ribs in a shallow glass baking dish and pour out all of the marinade on the top. Roast in the oven for about 45 minutes, until meat is between 160 and 170 degrees. Remove from oven, loosely cover with foil, and let rest for about 10 minutes longer (they're still cooking, but rather than getting over-cooked, this allows them to raise their temp and become more tender too).


Green Bean Bundles
From Paula Deen & Friends: Living it Up, Southern Style
Ingredients
Green beans, washed and trimmed (about 1 cup per person)
Butter (1 Tablespoon per person)
Salt & Pepper

Directions
Preheat grill for medium-high heat.

For each person, tear off a square of tin foil (12"x12" should do it).  Put the green beans in the middle, and top with the butter (cut into small cubes), and salt and pepper to taste. Make each square of foil into a tightly-sealed bundle.

Place each bundle on the grill (direct heat) for 15 minutes.


Bruschetta
Adapted from "The Maroon Spoon" (Holland Christian Cookbook)
Ingredients
For Bruschetta:
6 chopped Roma (plum) tomatoes
1 cup fresh basil, chopped
1-14 ounce can artichoke hearts, chopped
4 green onions, chopped
3 cloves garlic, minced
1 Tbsp. vinegar (balsamic or white wine)
1 tsp. pepper
1 tsp. olive oil
For Toasts:
1 large french baguette, thinly sliced on diagonal
3 Tbsp. olive oil

Directions
For bruschetta, mix all ingredients together and let sit for at least 1 hour in the refrigerator. (Doesn't keep well for more than 48 hours if you use fresh basil. If you choose to use dried basil, you'll need less and it might keep a bit longer.)

For toasts, brush slices with olive oil and toast under broiler until golden brown, flipping once.

To serve, top toast with a spoonful of tomato mixture. Top with shredded parmesan if desired.

6.25.2010

Men in the Kitchen

Today, Steve and I teamed up for dinner, and the recipe came out of a Men's Health magazine. We actually ate this maybe two years ago, but if you're like me, your recipe file/box/cupboard is a smash-up of different clippings/notes/cards.  While I was cleaning it out last week, I ran across this recipe and it looked pretty good, and pretty healthy too! Plus (and this is no coincidence), the kind of steak I needed was on sale:).

The only beef (haha!) I had with the dish is that in the picture, the onions look quite a bit more red than mine turned out. I wonder if they used red wine vinegar instead of balsamic? Or a mix? The balsamic was nice, though I know the flavor isn't for everyone. Next time, what would I do differently? I would change up the vinegars a bit, and maybe combine some Yukon Gold potatoes with the beans for a little lighter texture! Time will tell.

Grilled Italian Steak with Smashed Beans
From "Men's Health," January/February 2008

Ingredients
12 oz. Skirt, Flank, or Flatiron Steak (we used Flatiron)
2 Tbsp olive oil
2 cloves garlic, minced
1-15oz can cannellini beans
Juice of 1/2 lemon
1 large onion, halved and sliced
2 Tbsp balsamic vinegar
Salt and pepper

Directions
Salt and pepper both sides of the steak(s). Let rest for a few minutes before grilling.

In a skillet over medium heat, cook the onion in 1 Tbsp olive oil for 10 minutes, until it's soft and slightly brown. Add the vinegar and cook for another 5 minutes.

Heat another skillet/pan with the rest of the olive oil over medium heat. Add the garlic, beans and about 1/2 of the liquid from the can of beans (discard the rest). Cook for 5 minutes. Use a potato masher, fork or back of a spoon to roughly mash the beans. Add lemon juice and salt and pepper to taste.

Heat a grill/grill pan/cast iron skillet over high heat. Grill steaks for 3-4 minutes per side for medium rare (again, for a flatiron steak; may be longer for a thicker cut).  Slice and serve with beans, top with onions.

Serves 2

6.23.2010

Here Fishy, Fishy, Fishy...

"This summer, I will try more recipes for fish and healthy seafood."
So said I a month ago. But, I tried my first recipe today, which is only two days after the official start of summer, so I'm all good, right?

Steve's not a huge fan of seafood and I'm a little skiddish of making it at home, but a soup sounded like an easy way to go. And it was! It made our house smell great too.

Now, sure the recipe calls for bacon, oil, and cream, but don't let that scare you off. They're in reasonable amounts, and if you use healthy oil and fat free half and half, it helps. The bacon... well, its bacon. Not much you can do about that.

Side note on the fish - every chef or cook will tell you fresh seafood is better than frozen, which it is. But I had the tilapia in the freezer and forgot to thaw it. So I just cut it while it was frozen and it worked so well! The pieces were all a uniform size and cut really easily, and since it cooks in the broth, being frozen was not an issue.

The soup was really good! It was fresh-tasting, not too fishy, not too heavy, and with a little bread or salad on the side, makes a nice supper. The only drawback is (and this may not even bother you) that when it cooled, while I was putting the leftovers away, the soup smelled much fishy-er. I think it should re-heat fine, but next time, I'll just make enough for one meal and call it good.

Tilapia Corn Chowder
Not really adapted from Foodnetwork.com
Ingredients
2 ounces bacon (about 2 slices)
1 teaspoon canola oil
1 leek, white part only, halved lengthwise, rinsed and thinly sliced
1/2 teaspoon salt
1/2 teaspoon freshly ground pepper
4 cups reduced-sodium chicken broth
8 ounces Yukon Gold potatoes, diced
2 cups fresh or frozen corn kernels (about 4 ears)
1 1/2 pounds tilapia fillets, cut into bite-size pieces
1 teaspoon finely chopped fresh thyme (I didn't use this, don't let that stop you though!)
1 cup half-and-half
2 teaspoons lemon juice
2 tablespoons chopped fresh chives

Directions

Chop bacon and cook in a large Dutch oven over medium heat until crispy, 3 to 4 minutes. Drain on paper towels.

Add oil to the pan. Add celery, leek, salt and pepper and cook until the vegetables just begin to soften, about 2 minutes. Add broth, potatoes and corn. Bring to a gentle simmer. Cook until the potatoes are just tender and the corn is cooked through, about 8 minutes. Stir in tilapia and thyme; return to a gentle simmer. Cook until the tilapia is cooked through, about 4 minutes more. Remove from the heat.

Stir in half-and-half, lemon juice and the reserved bacon. Garnish with chives, if using.

6.22.2010

All-American?

In my humble opinion, I think hamburgers are the best example of an All-American food. They're not some far distant cousin to its original form like pizza, or an Americanized version of the real-deal, like Kung Pao Chicken. Sure, its named after a city in Germany, but from what I've read, that probably has more to do with where the inventor's parents came from, not the food itself.

So... burgers on the grill for supper tonight! We took some advice from Emeril and "kicked it up a notch." When we eat burgers, Steve usually requests this cucumber salad to go along with it. Its a nice contrast with the burger because of all its crunch and tangy-ness. The burgers were really good - I wouldn't go so far as to say fantastic, because they seemed a little dry.  Granted, I did over-cook them slightly, but I wonder about making a goat-cheese spread and mixing it with some sour cream to give it a little more moisture. And some chives too? We'll have to see next time...

I don't have a specific recipe for everything we ate, but I'll walk you through our tasty summer supper!

Cucumber Salad
You could use regular cukes for this recipe, but I found out they're really hard for your body to digest unless you peel and seed them first. They make cool little half-moons if you do that, but I like crunchiness of hothouse cukes too. And they were on sale. :)
1 kirby/hothouse cucumber, thinly sliced
1/4 cup vinegar (be creative and use apple cider, rice, white wine, or distilled vinegar, or a combination! I usually use part rice vinegar and part distilled vinegar)
1/4ish white onion, thinly sliced
salt and pepper

Mix all of the ingredients and let sit in the fridge for at least 1 hour before serving.

Turkey Burgers with Red Peppers and Goat Cheese
Wash red peppers, remove any stickers, and put them on the grill whole over high heat. Turning occasionally, grill until most of the skin is black and blistered, but not smoking. Remove and immediately put into a lidded bowl (I used my Pampered Chef classic batter bowl). Cover and let sit for 10-15 minutes, and then remove skin by rubbing it off. Slice open, cut out the stem, and scrape out any seeds and remaining core. Rinse under cool water, pat dry, and cut to desired size. 
We roasted two red peppers for ourselves, but one would have been enough for the two of us. However, the leftovers will be great on sandwiches and in omlettes for the next few days!

Mix 1 package of ground turkey with a few cloves of chopped garlic and a handful of shredded white cheese (we used an Italian mix). Form into 4 patties with a slight depression in the middle - this prevents them from taking the shape of a football when grilling. Grill over medium-high heat, turning once, until cooked through (160 degrees inside). 

For goat cheese/chevre, go to the store and buy goat cheese. (I like things that are homemade, but come on, I'm not making my own cheese! Not yet anyway...) Four ounces should do the trick for 4 people, but I bought the bigger one because I'll be using it tomorrow for breakfast!

Place turkey burger on a whole wheat bun and top each with a few slices of goat cheese and roasted red pepper.

6.19.2010

Back on the Horse

Its never too late for a fresh start, right? So here's mine... after more than two months, I'm going to use this summer to jump back and continue telling you "What We Are Eating".

A week or so ago, my good friend Angel from college stopped by for a night (and an exciting night it was, one that brought us to the E.R. but not because of this recipe, I assure you). Before the excitement, I suggested we make dinner together, since that is something I love to do with friends, and it makes the eating that much more meaningful.  It is completely sharing a meal.  We ate a simple meal of spaghetti and meatballs, but simple does not mean it wasn't absolutely delicious.

Turkey Meatballs
Liberally adapted from Rachael Ray on the Food Network
Ingredients
1 1/3 pound ground turkey
1/2 medium onion, finely chopped
3 cloves garlic, chopped
1 egg
1/4 cup milk
3/4 cup bread crumbs
1/2 cup grated parmesan cheese
salt and pepper
olive oil to drizzle

Directions
Preheat oven to 400 degrees farenheit.


Mix all ingredients except olive oil. Using a small ice cream scoop, form into 18-24 meatballs, place on a baking sheet and drizzle lightly with olive oil. Bake 20 minutes or until cooked through.

If using in a sauce for pasta or as an appetizer, simmer baked meatballs in sauce for about 20 minutes.

4.03.2010

One-A-Penny, Two-A-Penny

The first time I heard about The Pioneer Woman, it was about a recipe that used mostly canned, pre-packaged, way-processed foods. Not that I'm a purist about using whole ingredients, but it turned me off for a while.

Then on Thursday, I was reading a blog (don't remember which one) that referenced The Pioneer Woman so I clicked on over, and the recipe that was on the front page was "Hot Cross Buns" - these haven't been an Easter tradition for me, but I thought to myself, "Why not start a new tradition?" So, off I went!

Hot Cross Buns
(Barely) Adapted from The Pioneer Woman

Ingredients
Buns
2 cups Whole Milk
½ cups Canola Oil
½ cups Sugar
1 package (2 1/4 Teaspoons) Active Dry Yeast
4 cups All-purpose Flour
½ cups (additional) Flour
½ teaspoons (heaping) Baking Powder
½ teaspoons (scant) Baking Soda
2 teaspoons Salt
¼ cups Sugar
1 teaspoon Cinnamon
Spices: Cardamom, Nutmeg, Allspice (optional)
½ cups Raisins

Glaze
1 whole Egg White
Splash Of Milk

Icing
1 cup Powdered Sugar
Splash Of Milk

Directions
Combine 2 cups milk, canola oil, and 1/2 cup sugar in a saucepan. Stir and heat until very warm but not boiling. Turn off the heat and allow to cool until mixture is still warm, but not hot to the touch – about 30 minutes.

Sprinkle yeast over mixture. Add 4 cups of flour and stir to combine. Mixture will be very sticky. Cover with a towel and set aside for 1 hour.

Add 1/2 cup flour, baking powder, baking soda, and salt. Stir till combined.

Combine 1/4 cup sugar with cinnamon and whatever other spices you want to use.

Lightly flour surface. Press to slightly flatten dough. Sprinkle a couple tablespoons of the sugar/cinnamon mixture. Sprinkle on about a third of the raisins. Then fold the dough over on itself and flatten again so the dough is “plain” again. Repeat the sugar/raisin process, then fold the dough again. Repeat a third time until all the raisins are used. (You won’t use all the sugar/cinnamon mixture.)

Pinch off large golf ball-size bunches of dough. With floured hands, quickly roll it into a ball, then turn the edges under themselves slightly to create a smooth top to the roll. Place on a cookie sheet sprayed lightly with non-stick spray. Cover and allow to rise in a warm place for at least 30 minutes - an hour is better.

Preheat oven to 400 degrees.

Mix 1 egg white with a splash of milk. Brush onto each roll.Bake for 20 minutes, give or take, or until tops of buns have turned nice and golden brown. Remove from pan and allow to cool completely on a cooling rack.

Icing
Mix powdered sugar with enough milk to make icing very thick. Start with 2 Tablespoons and add more as needed for consistency.

Add icing to a small Ziploc bag and snip the corner. Make icing crosses on each roll.

Makes 18-24 rolls

4.01.2010

One Pot Wonder

One pot meals are a favorite for me. Seeing as we don't have a dishwasher, the fewer pots/bowls/pans I use for a meal, the better. This one comes from Smitten Kitchen (which, by the way, if you haven't discovered yet, you are missing out!) Steve loved it, I loved it, and we both loved how little there was to clean up!

Arroz Con Pollo (Cuban Chicken with Rice)
Adapted from Gourmet Magazine and SmittenKitchen.com 

Ingredients
Chicken
3 large garlic cloves
2 tablespoons distilled white vinegar
2 teaspoons dried oregano, crumbled
3-4 large chicken breasts, cut into thirds
Rice
3 ounces Spanish chorizo (cured sausage), skin discarded and sausage cut into 1/4-inch-thick slices
1 tablespoon olive oil
2 medium onions, chopped
1 red bell pepper, chopped
3 large garlic cloves, chopped
2 teaspoons ground cumin
2 teaspoons dried oregano
1 1/2 teaspoons paprika
1 teaspoon crushed red pepper
1 lb. tomatoes, seeded and chopped
1 12-ounce. bottle beer (not dark)
1 1/2 cups reduced-sodium chicken broth
2 cups long-grain white rice (14 ounces) 

Directions
Mince and mash garlic to a paste with 2 teaspoons salt, then transfer to a large bowl. Stir in vinegar and oregano. Toss chicken with marinade until coated and marinate, covered and chilled, at least one hour, no more than two hours. 

Cook chorizo in olive oil in a 6- to 7-quart heavy pot (12 inches wide) over medium-high heat, stirring, until some fat is rendered, 2 to 3 minutes. Add onions, bell pepper, and garlic and cook, stirring until softened, about 5 minutes. Add cumin, oregano, paprika, 1 1/4 teaspoons salt, and crushed red pepper and cook, stirring, 1 minute. Add chicken with marinade to chorizo mixture and cook, uncovered, over medium heat, stirring frequently, 10 minutes.

Remove chicken from pot and set aside. Stir in tomatoes, beer, broth, and rice and bring to a boil, making sure rice is submerged. Add chicken back into pot.  Reduce heat to medium-low and cover pot with a tight fitting lid. Cook, stirring once or twice, until rice is tender, 20 to 30 minutes.

Remove from heat and let stand, covered, 5 minutes.

Serves 4


3.09.2010

Breakfast for Dinner

Breakfast for dinner is such a great idea - its usually pretty easy, pretty filling, and even hits a variety of food groups!

Lately I've been working hard on finding dinners to prep the night before so they are ready to go the next night for dinner. This strata is a great example. It took a little pre-preparation, but I had time on Sunday to do a few of these things (dry the tomatoes, cook the ham, cut the bread, etc...). Last night, I combined the bread, cheese, tomatoes, and ham in the baking dish and in a bowl, whisked the milk, cream, eggs, and seasoning. This morning I poured the eggs over and let it sit in the fridge, and when I got home at 5, I tossed it in the oven and it'll be good to go in just a few minutes! Can't wait...

Ham and Cheese Strata with Oven-Dried Tomatoes
Adapted from Food Network

Ingredients
1 pint grape tomatoes, washed and halved
1 1/2 teaspoons kosher salt
Extra-virgin olive oil
10 large eggs
1 1/2 cups milk
1/2 cup fat free cream
Pinch freshly grated nutmeg
Pinch cayenne pepper
1 teaspoon kosher salt
1/4 teaspoon freshly ground black pepper
1 cup diced baked ham
1 tablespoon minced flat-leaf parsley leaves
1 1/2 teaspoons thinly sliced fresh chives
2 cups shredded cheese (your choice)
2 demi-loaves sourdough bread, cut into 1/2 inch cubes (should be about 16oz by weight)

Directions
Do ahead: Preheat oven to 250 degrees F.  Toss tomatoes with olive oil and salt. Spread in a single layer on a baking sheet and roast for 1.5-2 hours, until slightly shriveled but not dried completely. If not using immediately, store the tomatoes in a sealed container in the refrigerator, for 3 to 4 days.

For strata: Spray a 9x13 baking dish with non-stick cooking spray.

In a large bowl, whisk together the eggs, milk, cream, nutmeg, cayenne, salt, and pepper. Set aside. In a small bowl, toss together the bread, ham, tomatoes, parsley, chives and cheese.

Pour the egg mixture over the strata and gently press it down with the back of a large spoon to make sure the top layer is moistened with the custard. Cover with plastic wrap and refrigerate overnight.

When ready to bake, preheat the oven to 350 degrees F. Bake the strata, uncovered, until golden brown and slightly puffed, about 45 to 55 minutes. Let rest 10 minutes before serving.

Makes 6 to 8 servings

3.05.2010

More Rice For Dinner

Last Friday night, I made rice pudding for my dinner. So this Friday, I'm using rice again, although this time it may be a slightly more appropriate dish for a main meal.  Many times I've made risotto when Steve is off at work on a Friday night.  To just stand there and stir a pot, adding things slowly and watching it come together - its very theraputic after a long week of working.
A few things I've noticed:
  • You can use a medium/large saucepan or a large sauté pan that's deep enough to hold it all and stir.  I think making it in a saucepan lets the starch develop a little more, but in a sauté pan, it goes a little faster because there's more surface area.
  • Use an onion that has a lot of flavor to it. I like vidalia's for most things, but they're not strong enough for this. Spanish yellow onions work well.
  • Go for the chicken stock. Once I used chicken broth and had to make it go a little farther with water, and the flavor was much weaker.
  • You've got to use the real deal when it comes to parmesan cheese - you want it to melt, and the Kraft parm (or similar type) just doesn't melt and mix as well.
Classic Risotto
Adapted from... lots of places

Ingredients
1 Tablespoon butter
1 Tablespoon oil (olive oil or canola will do just fine)
1 medium onion, finely chopped
3/4 cup white wine
1 1/2 cups Arborio rice
4-5 cups chicken stock
parmesan cheese for grating

Directions
In a saucepan, begin to heat your chicken stock on medium-low heat (this will not be the same pan you use to make the actual risotto).

Over medium-high heat, melt butter with oil in pan - add onions and sauté until soft and slightly translucent.  Pour in wine and stir to deglaze the pan; simmer until most of the liquid has evaporated.  Add rice and stir well - allow to get dry, almost as if you are toasting the rice. 

Once dry, add enough chicken stock to just come to the top of the rice.  Allow to simmer, stirring frequently, until all of the moisture has been absorbed. Repeat this step until rice has become tender and the mixture is creamy (35-45 minutes). You don't have to stir constantly, but I wouldn't wander too far from the stove.  When risotto is almost finished, grate a bit of cheese into it for some flavor. When its ready to serve, grate a little more cheese on top of each serving.

Makes 6 servings