Showing posts with label candy. Show all posts

12.24.2011

Mints & Fudge (or "Why I'm on a Sugar Buzz That Will Last Till Next Tuesday")

Merry Christmas!
For the past month, I've been telling Steve that it just doesn't feel like Christmas, and I couldn't put my finger on why that was. Maybe because there was no snow, or maybe I was just feeling grinch-y, but I finally figured it out.  Two weeks ago, I was elbows-deep in a batch of banket when it finally started to feel like Christmas. Turns out, the key to it all is going crazy with cooking and baking - then it feels like Chrismas is upon us!

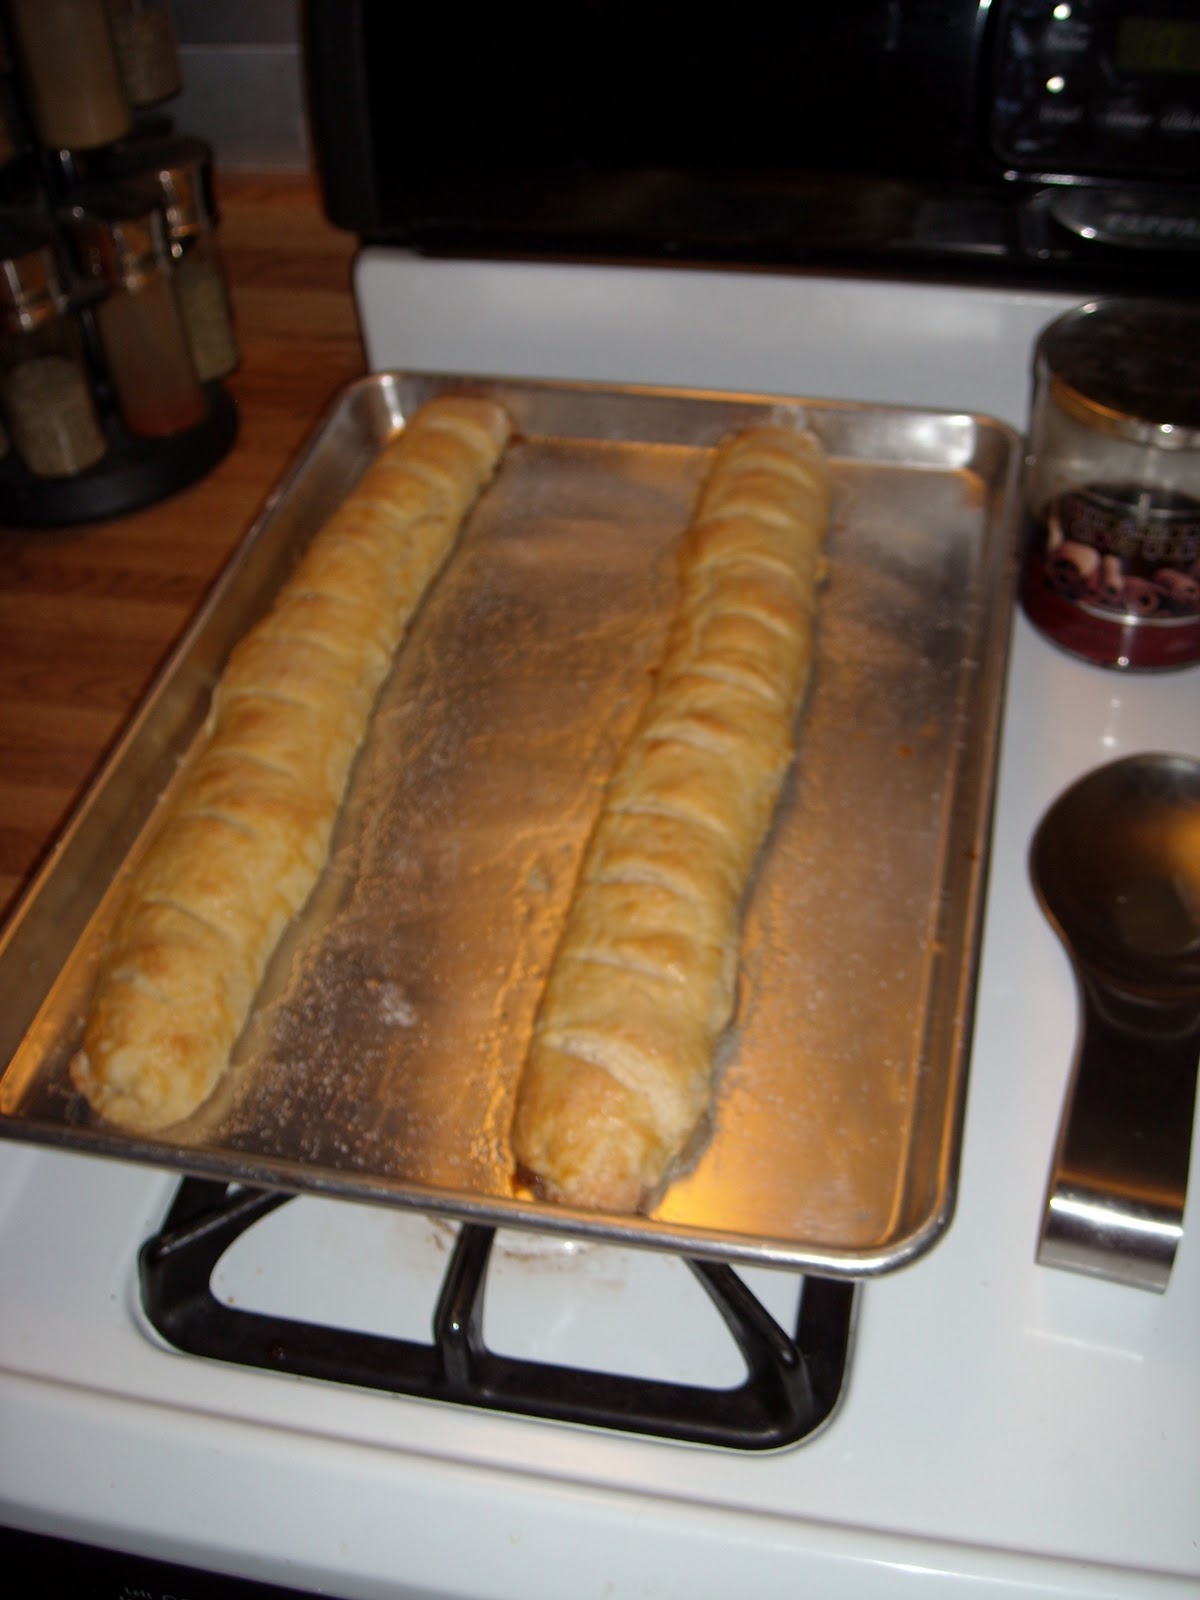
The banket was a total bust this year (fortunately there are certain members of my family who will simply scrape off the disastrous crust and eat the almond filling), but I did have two smashing successes - homemade peppermint patties and, as always, fudge.

Tomorrow (or maybe Monday...) I'll share the peppermint patties recipe, but today, for the fudge. Now, the recipe is pretty standard, but it was my Grandma Smits' specialty, so even if the recipe is well-known, the fudge itself is special. This year, I made it with 60% cocoa, so it wasn't as super-sweet, and it really nice! I like the bit of dark chocolate. And Henry didn't seem to mind either.

The recipe will come in a sec, but first, I've gotten lots of comments about how perfectly porportioned it is when cut, so as an early Christmas gift, I'll show you step-by-detailed-step how I do it:


1. Prepping the Pan
Even before mixing up the fudge, line two 8x8 pans with plastic wrap. I use two pieces, one going each way, and then spray them lightly with canola spray (it has the lightest taste). Make sure you use pans that have squared corners, not rounded, to get the best corners on your candy.


2. Make the Fudge
See recipe below.

3. Prepare to Cut
Once the fudge has cooled to room temperature, put it in the fridge for 15-20 minutes, to let it harden a little more. Then, using the overhang of the plastic wrap, lift the fudge out of the pan and on to a cutting board.

 4. The Tools
In addition to the cutting board, you'll need a ruler (clean, please!) that is 1" wide (most school rulers are), a pizza cutter, and hot water.


5. Marking it Off
Start with the ruler on one edge of the fudge.

Turn it on its edge without moving the ruler over. While its standing vertically, press down lightly, just enough to mark it, not to cut through.


Next, turn it onto the other side...


...and then stand it vertically again.

 Continue until you've reached the other edge of the fudge.


Turn the fudge and repeat going the other direction.


6. Cutting the Fudge
Run the pizza cutter under hot water, or dip it into a small bowl of hot water.
Then, run the pizza cutter along the ruler markings going one way first...
... and then the other direction, re-dipping/rinsing the pizza cutter as needed.
After cutting along all of the marks throw the fudge in the fridge for a few minutes to let it re-harden along the lines you just cut.

Note that my work has been carefully monitored every step of the way. This is to ensure the highest-quality results for you, of course. No personal interest on his part whatsoever.


7. Finishing Up

Once you're ready to plate or package up your candy, bend the plastic wrap from underneath to pop off a piece at a time.


Finished product!


Of course, mine is packaged up in the Rijksmuseum tin from Grandma - it wouldn't taste as good otherwise!

Grandma Smits' Fudge

Ingredients
3/4 cups (1 1/2 sticks) Butter
3 cups Sugar
2/3 cup Evaporated Milk
12 oz. dark chocolate chips*
7 oz Marshmallow Creme
1 teaspoon vanilla extract

Directions
1. Combine butter, sugar, and milk in a large saucepan; bring to full rolling bail, stirring constantly. Continue boiling over medium heat, stirring constantly, until a candy thermometer reads 234 degrees (about 5 minutes).

2. Remove from heat, stir in chocolate until melted; stir in remaining ingredients until completely combined. Pour into prepared baking pans. Let cool and cut into 1-inch squares using above method.

Yield: 3 pounds, 98 pieces


* Use different flavor chips for different flavor fudge (example: peanut butter chips, butterscotch chips, mint chocolate chips, you get the idea...)



12.20.2010

Christmas Eating, Part 1

This year, I have been so excited for all of the food I get to make! Call me crazy, but the fact that I had to use Google Calendars to figure out what I would make and when... that just about did me in. I love it.

For round one, its been mostly sweets, much to the chagrin of Steve. But most of it has been given away (or  ever-so-selflessly taken care of by the dog) which is what I love about baking and cooking during this time of year anyway. If its all about family and friends, that's who I should be sharing with!

So for starters, a few recipes that I've made, two sweet, one savory. If there's still time (or room on your own calendar) to make one of these for Christmas or New Year's, I highly recommend it!

Recipe #1 - Banket

This one gets top billing because it is banket. Enough said.
I did figure out, though, that while butter makes most baked goods 10x better, it is not the case for this particular pastry. It makes the dough too delicate and it doesn't stand up well with the filling. I'm making another batch this week and will definitely use margerine. My Grandma Smits used Imperial, so that's my plan too!


No Air Banket
Recipe from Grandma Smits, Jane Adama, and Helen Koopman

Ingredients
Dough
2 cups cold margerine, cut into small pieces
3 cups flour
1/4 cup water

Filling
1 pound almond paste (please don't use the stuff in a can!)
2 cups sugar
2 egg whites (reserve the yolks for later)
Almond flavoring, optional

Directions
1. Mix dough ingredients until they just come together and margerine is completely incorporated. Form into a flat disc, wrap in plastic wrap, and refrigerate.

2. Mix filling ingredients.

3. Roll out half of the chilled dough to approximately 10 x 15 inches and cut in half (no need to seperate the two halves. Its just a dividing line).  Divide the filling into fourths. Take 1/4 of the filling, roll into long segments, and place lengthwise down one section of the dough. Roll the dough tightly around the filling, overlapping the two edges, and seal with your fingertips. Pinch together the two ends of the roll. Place seam side down on a parchment paper-lined baking sheet, and repeat with other half of the rolled out dough.

4. Repeat step three with the remaining dough and filling.

5. Lightly beat egg yolks with 1 Tablespoon of water. Brush on the top of each roll, sprinkle with sugar, and cut small, shallow slits on the top of the dough to release some of the steam (about 1"-1.5" apart).

6. Bake at 375 for about 30 minutes until golden brown on the top. Keep the banket on the pan, but set the pan on a cooling rack. Once cool, wrap in plastic wrap - they will keep well for about a week (if it lasts that long) or wrap in a layer of tin foil as well and freeze.

Makes 4 - 15" sticks


Recipe #2 - Almond Roca
This might be the easiest candy to make. If you have a good candy thermometer, there's nothing to fear! I've made 4 batches, one more than necessary, because I was sure one of them wouldn't turn out. Right now, we still have about half of a batch sitting on our counter, calling my name, if that tells you anything about my success with the recipe. It works, trust me! No adjustments needed.

Almond Roca
Only slightly changed from the recipe at Taste of Home

Ingredients
1/2 cup slivered almonds
1 cup butter, cubed
1 cup sugar
3 Tablespoons boiling water
2 Tablespoons light corn syrup
1 cup semi-sweet chocolate chips

Directions
1. Sprinkle almonds on a 10 x 15 baking sheet. Bake at 300 for about 15 minutes until toasted (you'll know when they're done - as soon as you can smell the almonds, take them out).  Remove the pan from the oven (don't remove the almonds from the pan) and set aside. Turn off the oven.

2. In a large saucepan over low heat, cook butter and sugar for 5 minutes. Add water and corn syrup. Bring to a boil over medium heat; cook, stirring occasionally, until a candy thermometer reads 290° (hard-crack stage). Quickly pour over almonds. Sprinkle chips on top and put in the cooling oven for 1-2 minutes or until melted. Spread chocolate over candy.

3. After chocolate is spread, use a pizza cutter to cut the candy into the size pieces you'd like to have when you break it later on. They won't always come out perfectly, but it  creates a slightly more uniform candy. Cool completely; break into pieces. If you want a more "rustic" looking candy, skip the cutting earlier on and just break it up how it wants to be broken.

Makes about 1 1/2 pounds of candy


Recipe #3 - Ham & Cheese in Puff Pastry
Are you going to a Christmas party where there will be kids? Want to take something good to eat that's not too far outside of a kid's preferances? This is the thing. The title pretty much explains it all. My mom's made it before and eaten it as a main course, and why not? Its pretty much a fancy ham and cheese sandwich, but you can totally get away with making it an appetizer or finger food at a festive party.

Ham & Cheese in Puff Pastry
Adapted from The Barefoot Contessa

Ingredients
1 package frozen puff pastry, defrosted
1 Tablespoon whole grain mustard
1 Tablespoon dijon mustard
1/4 pound black forest ham
1/2 pound swiss or gruyere cheese
1 egg beaten with 1 Tablespoon water (for egg wash)

Directions
1. Preheat the oven to 450 degrees F. Line a 10 x 15 baking sheet with parchment paper.

2. Lay 1 sheet of puff pastry on a floured board and carefully roll it out to 10 by 12 inches. Place it on a sheet pan and brush the center with the mustard, leaving a 1-inch border around the edge. Place a layer first of ham and then cheese, also leaving a 1-inch border. Brush the border with the egg wash.

3. Place the second sheet of puff pastry on the floured board and roll it out to 10 by 12 inches. Place the second sheet on top of the filled pastry, lining up the edges. Cut the edges straight with a small, sharp knife and press together lightly. Brush the top with egg wash and cut a few slits in the top to allow steam to escape.

4. Bake for 20 to 25 minutes, until puffed and golden brown. Cut into desired size pieces, whether for a main dish or for an appetizer/finger food. Allow to cool for a few minutes and serve hot or warm.